Tuesday, January 31, 2017

creating with a kid: scrunch paper


My long time readers know I've been making art with Lucy from day one. From riding on my back while I filmed online classes to letting her create with me in the studio, it's been a priority to share the art making process with my daughter. As I have mentioned in the past it is important for both my husband and I to incorporate Lucy into as many creative projects as possible. And while it makes no difference to us if Lucy grows up to be an artist, we do want her to be a creative thinker. I believe creativity and the ability to think in a creative way is one of the greatest gifts we can give our children and while I am always evolving as an artist and mama, I am learning so much as I watch her develop her own voice. 

I love finding projects that Lucy and I can both get excited about. I am finding that the older she gets, the more common creative interests we have! One thing I know from making art my entire life, is that often creativity is less about the finished product but more about the process. These days when I plan out art projects for Lucy I really try to come up with things that are are all about the process. 
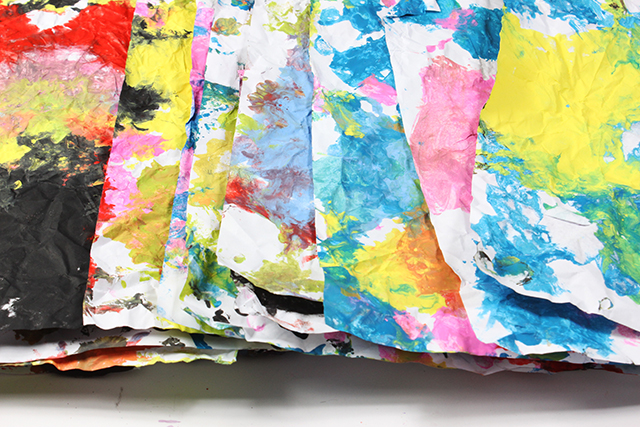
One of my favorite techniques is something that I call "scrunching". Basically it consists of slopping lots of paint on paper, canvas or fabric and then scrunching it up into a little ball. When you open up that little ball, your surface will be filled with color that has blended and mixed together and it will also have a lot of texture within that color.

This process is super fun to do with kids because it feels like you are doing something that your shouldn't do- crumble up your art!


TIP: Canvas and fabric can withstand lots of paint and lots of scrunching. Paper is more fragile with this process because it can rip easily so you have be careful when unwrap your piece of paper.

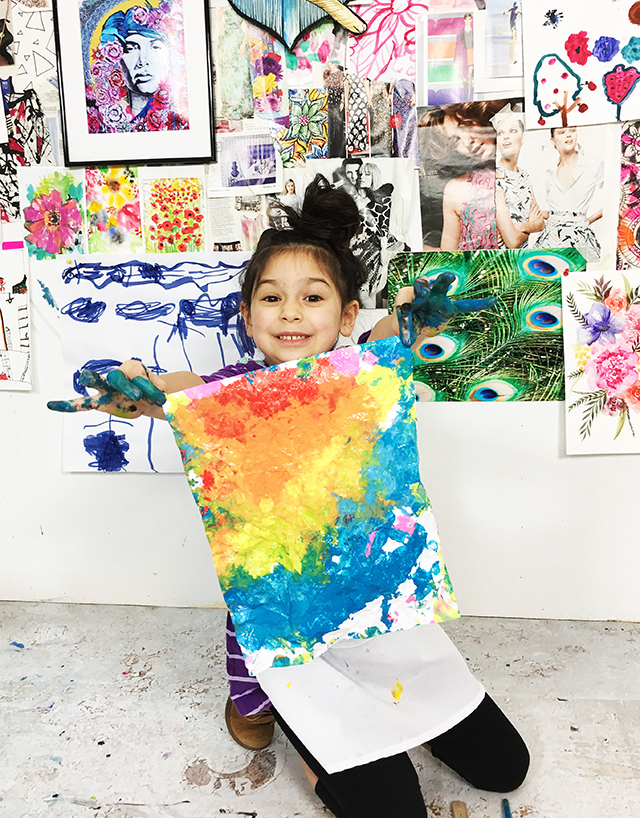
The process is messy and the results are colorful which makes it perfect for kiddos and creatives of all ages!

Once that paper is dry, we like to use it in the pages of art journals, to draw or doodle on or for cutting and ripping in collage projects.


You can check out my entire series of "Creating With a Kid" posts HERE

Monday, January 30, 2017

creating with jules: mosaic hearts


Yay, a new DIY craft project! I was super happy with how this idea came out and hope you love it too!


Materials you'll need:

Air dry clay
A variety of beads including seed beads, and other decorative items to mosaic; you could use buttons, tiles, gemstones... see what your stash holds or your local craft store
Acrylic Paint 
Decorative Papers with small designs
Gloss sealer/ medium (only if you're not using Mod Podge)
Tacky Craft Glue; I use a non toxic glue called "super-tac glue". It's similar to PVA but dries a bit faster holding bigger objects like for this tutorial
Embroidery thread in your chosen colors
Tassel
Mod Podge (Optional)

Other useful items: cutting mat, fine/ embroidery scissors, needle & thread, clay tools, scalpel or similar

Start by cutting out a heart template.

Take some air dry clay and roll out to approx 5mm thickness (3/16") on your cutting mat. 

Place your heart template onto the clay and cut around. Smooth edges with a clay tool or your fingers. 

Poke a hole for hanging in the top and bottom of the heart shape with a pointy clay tool. 


Roll out some more clay to around 4mm (3/16") thickness. Cut out little squares/ rectangles/ triangles/ odd shapes the sizes you would like your tiles. Make around half a dozen for one heart. Make a longer piece 4.5cm x 1.5cm (1 13/16 x 9/16") that you will glue the "love" type image onto. Smooth the edges and make sure they are flat. Leave the heart shape and the tiles for around 24 hours or until dry.

Now create the tiles:

Cut out little pieces of paper slightly larger than the shapes and paste the back with Mod Podge or PVA- type glue. Press onto the shapes firmly and leave for a minute or so. Trim around the edges with some fine scissors. Paint the fronts of your "tiles" with the mod podge or gloss sealer, and paint the edges with coloured acrylic paint. Make the 'love' tile in the same way.

Take some acrylic paints and paint the heart all over, front and back. I used some bright green with touches of yellow and turquoise on this one.

Using glue, add a rim around one side of the heart.

String some beads onto thread and start gluing them down. I chose beads that would fit onto a normal sewing needle. Keep stringing beads and gluing them down until you frame the whole outside of the heart.


Test out the placement of your tiles.

Next, fill the inside of the heart with tacky glue, and place your mosaic pieces onto the glue, leaving gaps between the decorative elements.

Once you have all the larger pieces in place, sprinkle seed beads into all the left over gaps. Careful when you are gluing and placing your pieces not to cover the two holes in the heart. Once the glue has dried sufficiently you can shake off the excess seed beads.


Thread some embroidery thread onto a needle and sew a tassel and some beads onto the bottom of the heart. I looped through the heart a few times as I liked the look of thicker cotton at the bottom. 


I hope you enjoyed the tutorial, and please let me know if you try it out, I'd love to see your creation!  Jules :)

To see more of my work or to get in touch, visit me at http://julesmadden.blogspot.com.au

Wednesday, January 25, 2017

sweet potato nachos

I've got a terrible love of junk food. One of my favorites is nachos and I crave them like crazy! And while there was a time when I would gobble up a pile of chips smothered in canned cheese sauce, these days it's really important for me to eat healthy. One of my favorite ways to "recreate" a healthier version of nachos is to substitute those chips with sweet potatoes


INGREDIENTS:
Thinly sliced sweet potatoes
Grated cheese
Black beans
Corn
Variety of peppers
Avocado
Green onions

Start by baking the sweet potato slices until crispy on the outside.

Add your favorites toppings and Enjoy!


Tuesday, January 24, 2017

creating with jules- galaxy necklace

Galaxy Pendant Necklace

Hello! Today I have a craft project for you that would make a great last minute gift for someone stylish in your life. If there are a few people in your life that would like one of these you could make a few at the same time like I did. It really does not take much more time to make six than it does to make one!

Materials:
Royal blue polymer clay
Acrylic paints in colours aqua, black, pink, white & silver
Liquid Polyclay (I use the Kato Polyclay brand)
One large jumpring 3/8” (10mm) diameter
2 smaller jumprings
Fold-over end crimps
Necklace cord (I used a waxed cotton cord)
Lobster clasp

Tools:
Scalpel
Old toothbrush
Paintbrushes
Sharp tool for making a hole in pendant; such as a wool needle
Round object such as small bottle to trace around
Jewelry pliers (inexpensive to buy from craft stores)

Other items: Baking tray, baking paper, tile/ glass, paper.

Find yourself a round object to make a template from in your desired size. I used the bottom of a bottle of paint that was 1 1/2” (4cm) in diameter. Trace around the bottom of the object onto a piece of paper to make a template. Cut out. 

Take your polymer clay and condition until soft. If you use a brand such as Sculpey it should already be soft enough to use. Roll out to about 1/8” (3mm) thickness.

Tip: A smooth tile or piece of glass is a good surface for working with polymer clay on. 

Place your template onto the clay and cut around the shape with the scalpel. Smooth out any rough edges with your fingers or the back of your nails. Use the needle to make a hole in the top. Wiggle the needle a bit so the hole will be a bit bigger than the thickness of your large jumpring. Bake according to the clay manufacturer’s instructions on a tray lined with baking paper.
Once cool, take your aqua paint and dab on here and there with a paintbrush. I used a scruffy one that is round but is fairly flat at the bristle end. Next dab on your pink, then black, leaving to dry in between layers. Remember to leave some of the original blue clay colour showing through. 


Once those layers are dry, water down some white acrylic paint until you have a runny cream consistency. Dip the old toothbrush into the paint and splatter over the pendant, flicking the bristles with your finger. Using a fine paintbrush, dot some bigger ‘stars’ onto the pendant. 

Once this is dry you can take your silver paint and brush over the bottom third of the pendant and paint the sides with the silver too.

Once it’s dry cover the whole pendant with the liquid polyclay.
I use an old paintbrush for this but some people just use their finger. This stuff makes your piece really durable and scratch resistant. Bake according to the instructions on the bottle. 

Tip: You may want to test this out on a practice piece first! If your oven runs too hot you may get bubbles. I learned this from experience!

Once it’s all baked and cooled you can place your big jump ring in the top of the pendant. Trim your cord to desired length. Thread pendant onto cord and crimp the end clamps over the ends using the pliers. Add the smaller jump rings and lobster clasp and it’s good to go! 

Pop in a small gift box decorated with some pretty paper with some bright string wrapped around. Or keep it yourself!


Thanks for getting crafty with me!
To see more of my work or get in touch visit me at http://julesmadden.blogspot.com.au 


Monday, January 23, 2017

a peek inside my sketchbook- playing with kid's markers


There is no rule that says you have to use trendy or expensive supplies when you create! In fact, I love to challenge myself to get creative with simple supplies that I have on hand. Something I have a lot of these days is kid's markers and they are one of my favorite supplies to play with!


Today I've got a little peek into my art journal in a video where I share the process of using markers to create a fast colorful background. If you are looking for more videos, head on over to my YouTube channel where I upload all kinds of videos of my process.


Wednesday, January 18, 2017

NEW online classes with MAKEWELLS!

You guys! I am so excited to announce that I will be offering some online lettering classes from my dear friend Megan Wells of Makewells! Megan is a crazy talented artist who has a gift for hand lettering. Megan is a painter, illustrator, surface pattern designer and author of Hand-Lettering, An Interactive Guide to the Art of Drawing Letters. Megan has worked with Haper Collins, Minted, Pottery Barn Kids, Peter Pauper Press and more! Her approach is to lettering is totally relaxed, creative and she loves to break the rules (which is why we get along so well)!

Check out the classes below!


Drawin’ Letters with Makewells
LIVE March 15
$30.00
Register for class HERE

Learn the basics of hand lettering from a unique perspective with South Florida-based artist Megan Wells, of Makewells. This class will introduce you to creating a variety of stylistic letterforms through exercises, prompts, and practices, all based on the principles of drawing.  Megan will also show you ways to draw printed type and cursive scripts, how to transform letters, words, and phrases into creative works of art, and will share tips on discovering your own unique lettering style!   


Get Scripty
LIVE April 5
$30.00
Register for class HERE

Script style lettering is Meg's absolute favorite, so in this class she’ll be sharing tips and tricks on how to make your letters extra fancy and free! From flourishes and swirls to embellishments and illustrations, together we’ll explore the infinite ways to sketch, draw, and paint gorgeous, scripted letters, words and phrases, and we won’t be afraid to get a lil funky!

Letter Outside the Lines

LIVE April 26
$30.00
Register for class HERE

Take your lettering to the next creative level in this fun, “outside the box” class where Megan’s bound to help you break a few rules! Using a wide variety of materials and techniques, she'll share her favorite ways to take her original, hand lettering artworks beyond the pencil and pen, while walking you through her process of experimenting with letterforms and materials in her sketchbook.  


BUNDLE OF 3 CLASSES
$80 EARLY BIRD SPECIAL $70
Register for bundle HERE

The bundle includes all three classes:
Drawin' Letters
Get Scripty
Letter Outside the Lines

The bundle costs $80 (compare to $90 for a savings of $10) We've got an early bird special for $70 until February 1, 2017.

If you are interested in taking all three classes, the bundle is the best option for you!


Tuesday, January 17, 2017

canvas floor cloth

I have found that it's really easy to get caught up in home decor trends. While I love to use popular styles and patterns in our home, I don't like spending the money on items that I might get tired of over time. One thing I have been wanting is a colorful geometric or Moroccan inspired rug to go beneath one side of our kitchen counter. I wanted something long and narrow but the options that I found were the wrong size or were way out of my price range. When I run into this type of challenge (as many of you know), I like to figure out a way to make my own!

I settled on the one thing that I have lots of experience with...canvas! And while I know that canvas floor clothes are nothing new, I wanted to share this project to pass along a little inspiration to those of you out there on a tight home decor budget!

I've found that when creating canvas floor clothes, it helps to have your canvas primed really well. You can use any kind of canvas. Raw canvas or even canvas drop clothes will work, you will just need to prime it with gesso or white paint. I typically work with raw canvas but for this project I actually used medium weight cotton canvas, acrylic primed. I have a roll of this canvas that I've had for years that I pull out for floor clothes or projects that require a a heavy or smooth surface.
TIP: A canvas drop cloth will work just fine for this project but the cheaper drop clothes have a very loose weave and can distort over time. I've found that a couple coats of white paint (I use house paint) or gesso will give you a nice smooth and heavy surface for painting.
Even though my canvas came primed, I gave it one more coat of white paint and then I got busy painting pattern with acrylic paint. Before I started my project, I collected all kinds of inspiration from different rugs, patterns and designs. I decided that I wanted my floor cloth to have a crazy "mash up" of patterns and lots of color.

I also decided that I didn't want things to be too perfect or fussy so I free handed most of my patterns and embraced my lines and shapes being a little wonky.

Most of my painting projects end up going pretty fast but this floor cloth took me forever! There was a lot of space to fill and a lot of layers which means lots of time spent waiting for paint to dry.

The last step was to seal everything. I've tried a lot of products when it comes to sealing canvas and my favorite thing to use is Minwax Satin Water-Based Polyurethane. While a canvas floor mat will go through wear and tear, sealing it with a couple coats of polyurethane will make it last longer!
When using a canvas floor cloth in on hardwood floors, it is important to make sure it doesn't slip. You can use a floor gripper or double sided carpet tape under the floor cloth to keep it from moving.


You can check out how I created our doodled dishwasher HERE and our painted counter tops HERE

LinkWithin

Related Posts with Thumbnails